
With summer right around the corner and trails beginning to dry out, many families in Montana are beginning to plan for summer adventures. For many of us, those adventures include hiking, backpacking, and camping. While enjoyable, many associate these activities with nagging pain in the neck and back due to carrying a heavy pack for multiple hours or even days. However, much of this pain can be mitigated by properly fitting your backpack and knowing how to distribute the load. By taking a few simple steps, you can make a heavy pack feel light and enjoy your next trip without worrying about about the aches.
Measure Your Torso Length
The first step is finding the right back for your body size by measuring your torso length. The measurement is taken from your C7 vertebrae to a point level with your iliac crests. To begin, place your hand at the bottom of your neck while you nod forward and back. The prominent vertebrae that you feel below the movement is your C7. Next, place your hands on your hips and follow along that plane to middle of the spine. The measure between these points is your torso length. Torso ranges differ between brands of packs and many are adjustable. Check the sizing guide before making your purchase.
Packing the Backpack
Before adjusting the pack it’s important to know how to pack your gear. This step is vital to reduce excessive strain in the muscles, joints, and connective tissue of the neck and low back. A good rule of thumb is to place lightweight gear in the bottom of the pack with the heaviest items in the middle and closest to your back. Along with lighter gear, items that will be used last should be placed towards the bottom such as sleeping pads, sleeping bags, and camp equipment. Place heavier items such as food, water, and cooking pots in the middle on top of the lighter items. Lastly, place frequently utilized gear towards the top of the pack such as a rain jacket, sunglasses, sunscreen, snacks, and first aid kits. This minimizes the need to dig through the pack while you’re on the move.
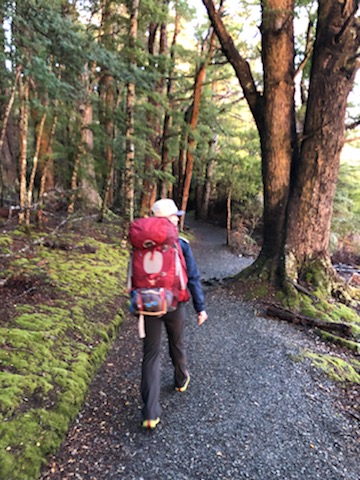
Adjust the pack
When adjusting the pack to your particular fit, follow the steps listed below. To ensure a more accurate fit, load the pack with the approximate amount of weight that you will use during your expedition during the fitting.
- Hip straps – Start with buckling the waist belt so that the padding of the straps rests on the top of the hip bones. You may need to adjust the shoulder straps to ensure the waist belt is at the right level. The padding should wrap around the front of the hips with a few inches of space between them.
- Shoulder straps – Adjust the shoulder straps to comfortably fit around the shoulders with the attachment of the strap to the pack a couple of inches below the shoulder. The majority of the weight should still be felt on the hips.
- Load haulers – Tension the load hauler straps until you achieve a 45-degree angle from the top of the shoulder to the top of the pack. The straps should stiff but not overly tensioned.
- Sternum strap – Adjust the height of the sternum strap to approximately one inch below the collarbone. The sternum strap should be tight enough to hold the shoulder straps medial to your shoulder but not so tight that they are uncomfortable or restrict breathing.
If you follow the steps outlined above and still can’t get the proper fit, seek out the assistance of a trained professional for a custom backpack fitting. However, if you continue to experience pain despite a good fit, then a physical therapist can work with you to identify the source of the pain and devise a treatment plan to get you back on the trail.
Nick Bechtold, PT, DPT, CSCS is a physical therapist at APRS Physical Therapy who specializes in treating orthopedic and sport-related injuries. Nick personally enjoys running, hiking, skiing, climbing, and weight training as well as helping individuals of all ages maintain a healthy, active lifestyle.


